Title here
Summary here
December 5, 2021 in Aerospace, Programming by ![]() Dhulkarnayn—9 minutes
Dhulkarnayn—9 minutes
Embarking on a journey from their military origins, Unmanned Aerial Vehicles (UAVs), or simply drones, have gracefully transcended their initial purpose. Today, these airborne marvels gracefully navigate diverse landscapes, becoming integral to numerous industries. Picture this: drones buzzing through the skies, not just as military sentinels but as versatile allies, revolutionizing the way we operate.
Image Credits: Technology illustrations by Storyset
In a world where drones have become omnipresent, industries are reaping the rewards of their accessibility and user-friendly design. These technological wonders are no longer confined to military zones; they’ve permeated various sectors, bringing innovation and efficiency in their wake.
Now, here’s where it gets exciting. Regardless of a drone’s pedigree or purpose, most modern drones are not just flying machines; they’re programmable aviators. Whether you’re tinkering with a DIY drone or harnessing the power of community-supported flight controllers like pixhawk or navio, there’s a game-changer in town—DroneKit-Python.
DroneKit-Python isn’t just an acronym; it’s a gateway to unlocking the full potential of your airborne companion. This nifty tool is an Application Programming Interface (API) that empowers developers to craft Python apps capable of seamless communication with drones. Imagine the possibilities—your code orchestrating a beautifully choreographed dance in the sky, all thanks to the magic of DroneKit-Python.
But wait, there’s more! Beneath the surface, this API communicates with drones over the MAVLink protocol, creating a language of commands and responses that allows your Python scripts to take the reins. It’s not just about controlling a drone; it’s about unleashing your creativity and making the sky your canvas.
So, whether you’re a coding maestro or just dipping your toes into the world of drone programming, DroneKit-Python beckons. The sky’s not the limit; it’s the beginning of your aerial coding adventure. Ready to take off?
In the bustling realm of drones, the need for autonomous take-off and landings isn’t just a fancy feature—it’s a game-changer. Picture this: a symphony of drones gracefully lifting off and gently touching down, all without human intervention. It’s not just about convenience; it’s about reshaping the landscape of possibilities.
Video Credits: AirHub
Enter the stage-stealer—the Drone-in-a-box technology. Imagine strategically placed containers in the heart of cities or sprawling refineries, serving as drone command hubs. These drones, like diligent workers, embark on missions and intelligently navigate back to their designated box havens after completing tasks.
But here’s the magic: these drones aren’t just landing; they’re performing a carefully choreographed dance, guided by the wizardry of visual navigation powered by artificially intelligent vision systems. It’s like witnessing a high-tech ballet in the sky, where every move is a testament to precision and automation.
And it doesn’t stop there. The applications are as diverse as the skies they navigate. From site inspections to data collection, the era of autonomous take-off and landings isn’t a luxury; it’s a necessity. Imagine a world where routine tasks are seamlessly executed, freeing human hands for endeavors that truly require our touch.
As we embrace this technological leap, autonomous operations aren’t just about cutting-edge efficiency. They’re about amplifying the overall effectiveness of drone systems. It’s the era where machines, guided by intelligence and precision, redefine the possibilities of what drones can achieve.
So, buckle up for a future where drones aren’t just flying; they’re dancing to the beat of autonomous symphonies. It’s not a revolution; it’s an evolution, and the sky is just the beginning. Welcome to the era of drones with wings of autonomy!
Behold the magic wand of the skies—a Python script named simpleMission.py that transforms drones into autonomous virtuosos. This isn’t just code; it’s the conductor orchestrating a ballet of takeoffs and landings in the vast expanse of the aerial stage.
 1# Import Necessary Packages
 2from dronekit import connect, VehicleMode,LocationGlobalRelative
 3import time
 4
 5def basicTakeOff(altitude):
 6
 7    """
 8    Inputs:
 9        1.  altitude            -   TakeOff Altitude
10    """
11
12    vehicle.mode = VehicleMode("GUIDED")
13    vehicle.armed = True
14    time.sleep(2)
15    vehicle.simple_takeoff(altitude)
16
17    while True:
18        print("Reached Height = ", vehicle.location.global_relative_frame.alt)
19
20        if vehicle.location.global_relative_frame.alt >= (altitude - 1.5):
21            break
22        time.sleep(1)
23
24
25# Connecting the Vehicle
26vehicle = connect('udpin:127.0.0.1:14551', baud=115200)
27
28# Takeoff the Vehicle
29takeOffAltitude = 10
30basicTakeOff(takeOffAltitude)
31print("Reached:", takeOffAltitude, " m")
32
33# Landing the Vehicle
34vehicle.mode=VehicleMode('LAND')
35print("Landing the Vehicle!!!")
36time.sleep(1)
37
38print("Exiting the Code!!!")
39time.sleep(1)
Source: Link
Imagine the scene: a command whispered, and drones gracefully ascend to the skies, then pirouette back to Earth with the finesse of aerial ballerinas. This isn’t just a script; it’s the overture to a symphony of autonomous flight.
python simpleMission.py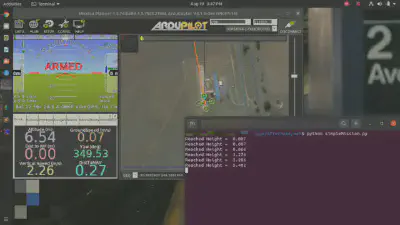
Video Credits: Dhulkarnayn, Elucidate Drones
It’s not just lines of code; it’s the crescendo of autonomous prowess. As the drones dance through the sky, guided by the script’s genius, each line is a step towards a future where the skies are alive with the magic of autonomy. The code exits, but the marvel lingers—a testament to the limitless possibilities penned in Python.
Welcome to the mesmerizing world of aerial choreography, where drones take center stage in a symphony of autonomous flight. Dive into the Python script simpleMission.py—more than lines of code; it’s the script that empowers drones to dance through the skies.
In the enchanting realm of Python, we summon our tools with a wave of code. Behold the incantation that brings forth the dronekit and time packages—the mystical ingredients for our aerial spell.
1# Import Necessary Packages
2from dronekit import connect, VehicleMode,LocationGlobalRelative
3import time
These magical scrolls hold the secrets to drone manipulation. With dronekit, we tap into a universe of commands to control our airborne companions. time ensures that our commands unfold in perfect harmony, syncing with the rhythm of the code.
The stage is set, and now, it’s time to establish a connection with our drone virtuosos. Enter the connect() method—an invocation that bridges the digital gap between our earthly realm and the celestial dance floor.
25# Connecting the Vehicle
26vehicle = connect('udpin:127.0.0.1:14551', baud=115200)
This is no ordinary connection; it’s the umbilical link, breathing life into our flying collaborators. The parameters in the incantation determine the dance tempo—setting the rate, baud, and heartbeat of our ethereal orchestra.
To choreograph a dance, one must guide the performers. In the realm of drones, the dance begins with a shift into GUIDED mode—a state of readiness and receptivity.
12vehicle.mode = VehicleMode("GUIDED")The VehicleMode() spell transforms our drones into willing acolytes, ready to receive instructions from the maestro—our Python script.
As the dancefloor opens, the drones ascend gracefully into the skies. But before the ascent, the motors must be armed—an initiation into the aerial waltz.
13vehicle.armed = True
14time.sleep(2)
Here, time itself becomes a dance partner, orchestrating a brief pause before the airborne ballet begins.
The time has come for our aerial companions to take flight. With the simple_takeoff() command, they gracefully ascend to the chosen altitude—a poetic takeoff into the realms above.
# Takeoff the Vehicle
takeOffAltitude = 10
vehicle.simple_takeoff(takeOffAltitude)
The altitude becomes the canvas, and the drones paint the sky with their elegant maneuvers.
As the drones soar, the script becomes the vigilant observer, ensuring each graceful move aligns with the choreography. The loop, a heartbeat in the code, checks the altitude, ensuring the dance remains within the desired bounds.
17while True:
18    print("Reached Height = ", vehicle.location.global_relative_frame.alt)
19
20    if vehicle.location.global_relative_frame.alt >= (altitude - 1.5):
21        break
22    time.sleep(1)
Here, every second is a beat, every print statement a note in the symphony of flight.
As the drones conclude their celestial performance, the descent begins. The script, with a change of mode, guides the descent—a gentle return to Earth’s embrace.
34vehicle.mode=VehicleMode('LAND')The aerial ballet concludes, leaving only the echoes of an enchanting code symphony.
This isn’t just a script; it’s a lyrical journey into the realm of autonomous flight. As the code concludes, the dance lingers—a testament to the elegance and precision of Python in orchestrating the drone ballet.
You’ve delved into the artistry of simpleMission.py, witnessed the dance of drones choreographed by Python’s enchanting script. Now, let’s transcend the semi-autonomous and ascend to the realm of true autonomy—a symphony that plays at every startup.
The script, a virtuoso in its own right, yearns for an encore every time the curtain of your companion computer rises. Yet, in its current state, it awaits your command for each performance.
.bashrcEnter the maestro, the .bashrc file—a magical scroll that orchestrates the grand entrance of your script with every login. This isn’t just automation; it’s the conductor’s wand, directing the drone symphony from the moment your computer greets you.
.bashrc BalladThe .bashrc file isn’t just a script; it’s a ballad sung in the language of Bash. With every login, it weaves the story of your terminal session—a tale of configurations, colors, and commands. Now, it craves a new verse—the one that whispers the initiation of the drone ballet.
The .bashrc ballad is a script with a flair for configurations. It sets the stage for your terminal experience, but its hunger for scripts goes beyond mere settings. It yearns for narratives that unfold with every login—a saga that begins with the graceful ascent of drones.
In the echoing chambers of your .bashrc file, add the spellbinding command that summons your drone dance:
python /path/to/your/script/simpleMission.pyWith this line, you breathe life into the script, embedding it in the very heartbeat of your companion computer.
As you log in, the curtain rises not just on a terminal but on a stage where drones take flight. The .bashrc ballad ensures that the drone symphony begins its performance with every boot—a ballet that transcends mere automation and becomes an integral part of your computing overture.
This isn’t just autonomy; it’s a celebration, an ode to the marriage of technology and artistry. Welcome to the finale where every boot is a standing ovation for the drone script that dances in harmony with your computer’s heartbeat.
Congratulations on reaching the end of our drone programming journey! 🚀 We’ve delved into the realm of autonomous take-off and landing using the powerful tool, DroneKit-Python. Now, your drones are not just flying; they’re dancing to your code!
Your thoughts and insights matter! Share your experiences, questions, or ninja-level drone programming tips in the comments below. Let’s build a buzzing community of drone enthusiasts!
Spread the knowledge—share this guide with your fellow drone aficionados. Until next time, happy coding and soaring through the skies! 🛰️✨
This post is licensed under Creative Commons Attribution-ShareAlike 4.0 International (CC BY-SA 4.0) by the author.
Please consider supporting this project!
If this article has been of help to you, and you feel generous at the moment, don’t hesitate to buy us a coffee. It's an easy, fun and direct way to show your support — any amount of coffee is highly appreciated.