Title here
Summary here
December 1, 2021 in Aerospace, Drones by ![]() Dhulkarnayn—7 minutes
Dhulkarnayn—7 minutes
Embarking on the journey to set up ArduPilot’s Software In The Loop (SITL) simulation environment on your Linux machine is an adventure waiting to unfold.1 Fear not, for the path ahead is paved with simplicity. With just a few taps on your keyboard, you’ll breathe life into the SITL build environment, transforming your device into a playground for drone development.
ArduPilot - Directory
Prepare to embark on a thrilling journey as we unfold the steps to set up the ArduPilot SITL environment on your Linux device. Brace yourself for the excitement that lies ahead, and let’s dive into the three crucial steps that will catapult your device into the realm of drone simulation magic:2
Did you know?
A vibrant network plan on your device is the secret sauce to fueling the SITL fire. Ensure your connection is alive and thriving!
Gear up, intrepid explorer! The path to SITL greatness awaits your footsteps. May your commands echo through the terminal, and may your simulations soar to new heights! 🌐🚁
Welcome to the grand performance of ArduPilot’s masterful composition, conducted through the harmonious rhythms of Git! Git, the virtuoso of version control, orchestrates the melodious dance of ArduPilot’s codebase. Join the ensemble and witness the seamless synchronization of files, ensuring a symphony of efficiency from small projects to grand endeavors.
To immerse yourself in this captivating melody on your Linux stage, follow these commands that will unveil the Git overture:
sudo apt-get update
sudo apt-get install git
Feel the exhilaration as you open the terminal curtain with the magical keyboard shortcut Ctrl + Alt + T. Let the performance begin, and may the rhythm of Git resonate through your coding endeavors!
🚀🎶 Join the Git symphony and embrace the harmony of version control! 🌐✨
Prepare for an exhilarating journey into the heart of ArduPilot’s realm, where innovation takes flight! It’s time to make a grand entrance into the GitHub stage and partake in the mesmerizing act of cloning—the secret sauce of the ArduPilot spectacle.
ArduPilot - GitHub Repository
As the curtains rise in your terminal theater, let the command take center stage, initiating the cloning ritual:
git clone https://github.com/ArduPilot/ardupilotNote
For those seeking a personalized encore, consider forking the main ArduPilot repository to your GitHub account before orchestrating the clone.
Feel the adrenaline surge as you delve deeper into the ArduPilot world, installing the submodules with a flourish:
cd ardupilot
git submodule update --init --recursive
A special feature awaits! Immerse yourself in the visual symphony of the cloning process with this captivating video interlude:
Video Credits: ArduPilot
Note
For a seamless performance, ensure your firewalls play in harmony. In case they resist the SSH rhythm, command Git to dance to the HTTPS beats with:
git config --global url."https://"Watch the magic unfold as HTTPS protocols gracefully take the lead, ensuring an uninterrupted spectacle!
🚀✨ Join the ArduPilot adventure—where cloning becomes an art, and innovation takes its wings! 🎭🌟
Prepare to infuse your Linux realm with the enchanting magic of ArduPilot SITL simulation! Unveil the wizardry of seamless setup with a series of incantations that will bring your machine to life.
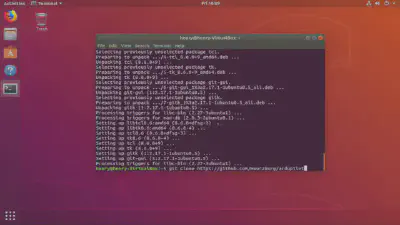
Behold, noble Debian users of Ubuntu and Mint, for the magical scroll lies in the Tools directory—execute the install-prereqs-ubuntu.sh script to summon the essential ingredients:
Tools/environment_install/install-prereqs-ubuntu.sh -yWitness the alchemical dance of codes as the script weaves a tapestry of required packages, magically materializing the foundation for your ArduPilot adventure.
In the sacred terminal chamber (ArduPilot directory), let the following command echo through the digital corridors, resonating with power:
. ~/.profileVoila, noble sorcerer! You’ve completed the ritual, and your Linux machine now hums with the mystic energies of the ArduPilot SITL simulation! 🌟🔮
Embark on your journey, and may your simulations be ever in your favor! 🚁🌌
Welcome, aspiring pilot of the digital skies! The ArduPilot realm beckons, offering a diverse fleet of virtual vehicles ready to dance through the simulated heavens:
Embark on your adventure by invoking the ancient commands in your digital grimoire. Navigate through the enchanted directories; for instance, to summon the spirit of the multi-copter, traverse to ardupilot/ArduCopter with this incantation:
cd ardupilot/ArduCopterNow, witness the magic unfold as you beckon the simulator into existence with the sacred script sim_vehicle.py. During the initial invocation, infuse it with the -w command to cleanse the virtual EEPROM and load the default parameters for your chosen vehicle:
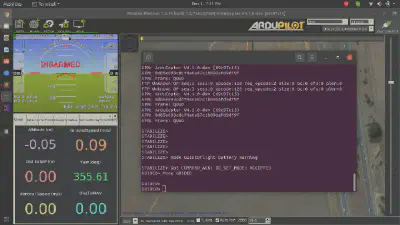
sim_vehicle.py -wBehold the mystical tableau that unfolds on your terminal canvas, revealing the essence of the virtual realm:

SITL - First Run
Once the default parameters are seamlessly woven into the fabric of your simulation, commence the grand spectacle! However, to perform this act, first extinguish the current invocation of sim_vehicle.py with the sacred key combination Ctrl + C. Now, breathe life back into the simulation with the following command:
sim_vehicle.py --console --mapPrepare to be enraptured by the symphony of the virtual skies, as your simulated vehicle dances through the ethereal landscapes. May your digital wings soar high, and your journey in the realms of ArduPilot be filled with wonder and discovery! 🌌🎮
Behold, seeker of skies, as we unravel the sacred rites to connect the ethereal vessel you’ve conjured within the ArduPilot SITL simulation to the mystical Ground Control Station (GCS) software, be it the enchanting QGroundControl or the venerable Mission Planner.
Prepare for the odyssey by attuning to the specific vehicle’s energy within the ArduPilot cosmos. In the sacred script of the terminal, traverse to the chosen vehicle’s sanctum; let’s say, for instance, the mesmerizing ArduCopter:
cd ardupilot/ArduCopterFor the adept souls already dwelling within the vehicle’s sanctum, this step is but a fleeting dance.
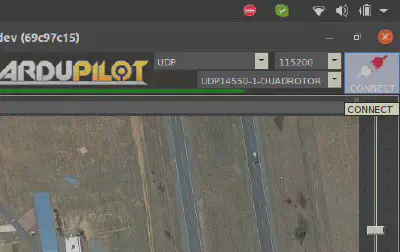
Now, let the Mavlink spirits flow! Channel their energies through the sacred portal of UDP, directing them to a new dimension encapsulated by the number 14551 in the realms of localhost:
sim_vehicle.py --out=udpout:127.0.0.1:14551Embark upon the sacred pilgrimage to the Mission Planner sanctuary. As you approach, the mystical connection unfolds; the port 14551 acts as the celestial bridge. Witness the arcane dance, as Mission Planner, drawn by the energies, auto-connects to the ethereal vessel.
Mission Planner - Connect Button
A gateway unveils itself as you engage the port dialogue. Invoke it by clicking the hallowed CONNECT button on the Mission Planner’s celestial spire. A dialogue box materializes, beckoning you to enter the sacred port number – 14551 – facilitating the communion between the virtual vessel and the mortal realm.
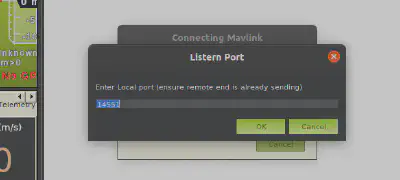
Listern Port (Dialog Box) - Mission Planner
With a resonant OK, witness the sublime connection, as the chosen vessel materializes within the hallowed halls of Mission Planner. Gaze upon the visage of the connected vehicle, ensconced in the STABILIZE mode, ready to embark upon its digital sojourn.

Vehicle Connected - Mission Planner
Delve deeper into the rhapsody, test the vessel’s responsiveness by issuing the divine command:
mode GUIDEDMarvel at the harmonious transition, as the vessel now dances to the tune of GUIDED mode, embracing its role in the celestial ballet.
Guided Mode - Mission Planner
Before you embark on this celestial journey, let the hidden wisdom guide you: Though Mission Planner has no native roots in the Linux soil, a cross-compiler named Mono can invoke its presence, bringing forth the GCS blessings to Linux realms.
May your digital skies be clear, and your connection with the GCS remain harmonious on this enchanting journey through the astral realms of ArduPilot! 🌌🎮
In the intricate realm of ArduPilot’s Software In the Loop (SITL) on Linux, you’ve navigated the cosmic currents. As our digital voyage concludes, your feedback becomes the compass guiding future explorers through this celestial journey.
Sharing this digital odyssey with your comrades is an act of caring—an invitation to partake in the boundless skies of knowledge. Spread the wings of wisdom, and may your shared insights echo through the digital cosmos.
Your thoughts await below in the comments section—share your flight tales and join the conversation! ✨🛰️🔧
Setting up SITL on Linux, ArduPilot. ↩︎
Setting up the Build Environment (Linux/Ubuntu), ArduPilot. ↩︎
This post is licensed under Creative Commons Attribution-ShareAlike 4.0 International (CC BY-SA 4.0) by the author.
Please consider supporting this project!
If this article has been of help to you, and you feel generous at the moment, don’t hesitate to buy us a coffee. It's an easy, fun and direct way to show your support — any amount of coffee is highly appreciated.